Over the past couple months, I’ve begun doing a lot of Parks On The Air activations. When activating from different parks, if I want to allow the hunters to get credit in LoTW among others, along with POTA credit, I have to make changes to my TQSL profile so the park I worked becomes one of my “Station Locations.” This process is not difficult and only takes a few minutes to accomplish. After I’ve done this, I can then upload the new park’s qso’s to Log Of The World and the hunters will then be able to get LoTW confirmation for their QSO with me from the park.
This post is more specifically geared for POTA parks. But, is easily adapted to any place you work as a radio op. I will now give you the simple steps to add a new TQSL location:
1. Start TQSL
You should start TQSL and have the main TQSL window looking similar to mine below:
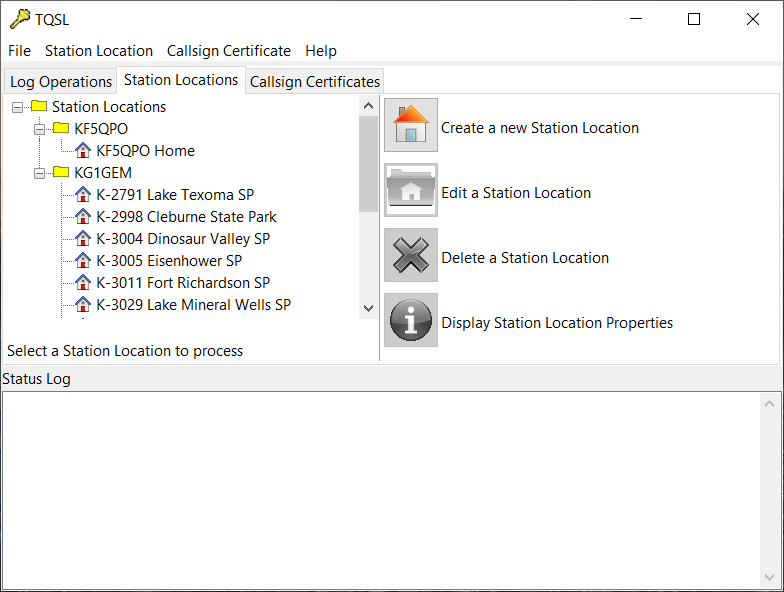
Once it’s started, click on the “Station Locations” tab as mine is showing above.
2. Create New Station Location
Click the icon next to the “Create a new Station Location.” This will open a new window and allow you to start adding the location information as shown below:
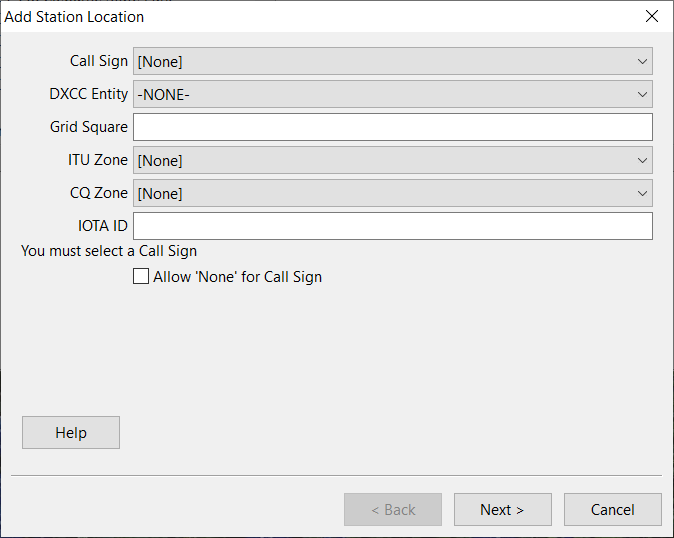
In this first window, choose the correct information for each piece of information.
Call Sign – Select the correct call sign for this location. If you have multiple hams using this computer, you will need to create a new location for each user.
DXCC Entity – Select the proper DXCC Entity for the park location.
Grid Square – This is probably where most people have issues for POTA. Your specific location you operated from within the park could have a different grid from someone else working in the park. The best way to determine your grid is using an app from you phone. Apps are available for both iPhone and Android devices. On iPhone, I use Ham Square. On Android, I just started using Grid Square Locator. You can find these in their respective app stores. These apps also give the latitude and longitude of the location. So, you can either make a note in a notebook or just take a screen shot of the location to use later.
ITU and CQ Zone – These should be pretty self explanatory. If you’re unsure, there are plenty of websites that will give you the information. https://zone-check.eu/ is a great one, as you can zoom in to any specific location, and the box in the upper left of the map will give you the grid, ITU and CQ zone. So, if you forgot to take a location shot, you can actually zoom in enough (at least in the US, haven’t tried other countries) to get that at the park you were working from.
IOTA ID – If the park happens to be on an island, enter the Islands On The Air (IOTA) ID for the location.
Once you’ve entered all the necessary information, click “Next.”
3. Enter State, County, Park
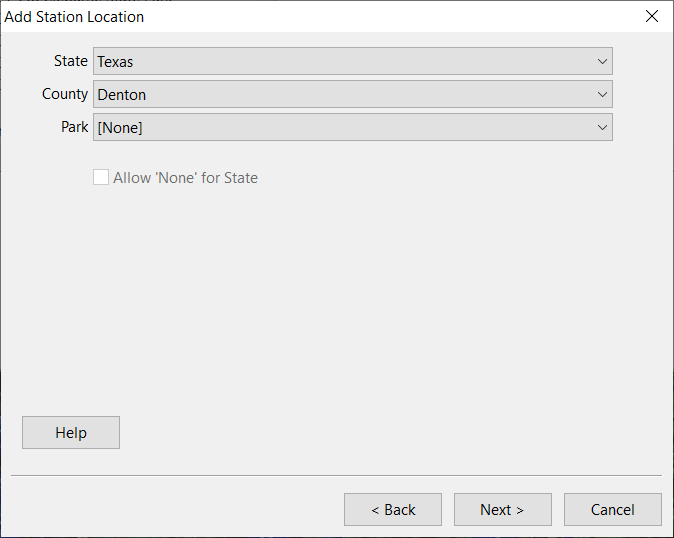
This page is pretty self-explanatory. If you’re not sure of the county the park is in, most parks pages will give you information. You can also use your choice of search engine for this information as well. Remember, parks may span multiple counties and even multiple. Because of this, it’s important to be vigilant when entering this information so hunters get the correct confirmations. I’ve even had luck asking park rangers at the park office.
Park – The park entry here was used for the National Parks On The Air that happened a few years ago. However, if this is one of these parks you worked for POTA, you can still select it here.
When you’re done, click “Next.”
4. Give The Entry A Name
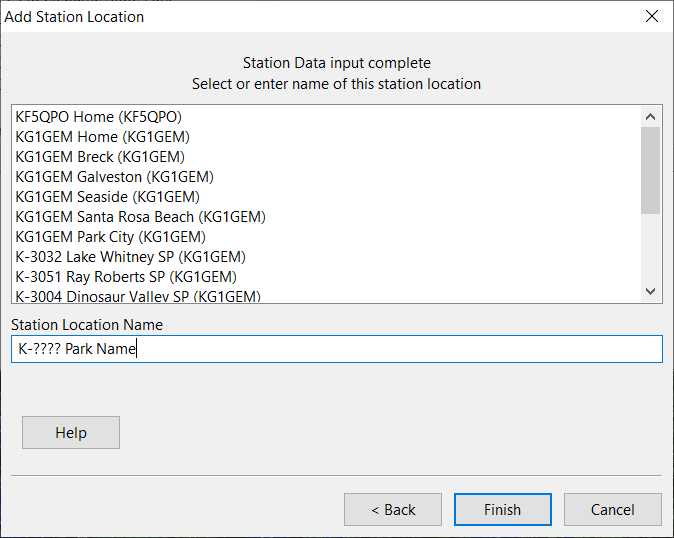
Giving the location a name is the last thing we have to do. Just be sure to make the name unique. If you work multiple locations in a park…more specifically, if the places you work in a park are in a different grid, state, or county, you should create a unique Station Location for each.
As you can see, my parks at the bottom of the list in the picture, I use the park number followed by the park name. Sometimes, I forget the park number and it’s easier to know the name when I go to upload, so I use both. If you have multiple unique grids/counties/states in a single park, you could, for example use “K-????-<state/county/grid> Park Name”, substituting what you need to be unique for the <> information above.
When you’ve give it a name, you should click “Finish.”
5. Upload Away
The newly created location should now show up in your station locations within TQSL. Now you should be able to upload with your favorite logger to LoTW with your newly created location. Each logging software is unique in how you choose what tqsl profile (ie. Station Location) you use to upload with. You will have to consult with your loggers documentation as that is beyond the scope of this blog.
For those new to LoTW or POTA or both, I hope that this helps you gain some insight into how to create your locations for properly uploading your POTA QSO’s to Log Of The World.
I look forward to working you from a park soon and maybe even getting that P2P with you. Hope your activations are always fun and you at least enjoy being in the beautiful parks!
Happy DX and 73!
Tim
KG1GEM
Thanks very much for this information!
This was exactly what I was looking for.
Building on your idea, I took it one step further by including both the POTA Park designation and the WWFF Park designation in my address line:
ex. “K-6890 KFF-4921 Cape Fear River Wetlands State Game Land”
tnx es 73, 44 Paul AA4XX
Thank you for the kind comment! Glad this was helpful to you! That’s a great idea on using WWFF as well. I’ll have to remember that for myself!
73 de Tim KG1GEM